Locations
The Locations section manages the physical storage places in your institution and tracks where objects are at any given time. Locations are arranged in a hierarchy that mirrors your physical layout.
Location hierarchy
Locations form a tree — for example:
Main Building
  ├── Store Room A
  │     ├── Shelf 1
  │     └── Shelf 2
  └── Gallery 1
        └── Case 3
Each location has a type that describes what kind of place it is: Building, Room, Gallery, Storage, Cabinet, Shelf, Case, or Drawer. Types affect icons and filtering but not functionality.
Storable locations are locations that can hold objects directly — typically shelves, cases, drawers, or cabinets. Higher-level locations (buildings, rooms) are containers for navigating the hierarchy but do not hold objects themselves.
Creating locations
Select a parent location in the tree and click + Add child. To create a top-level location, use + New location. Every location requires a name. Setting Can store objects makes it available when checking in resources.
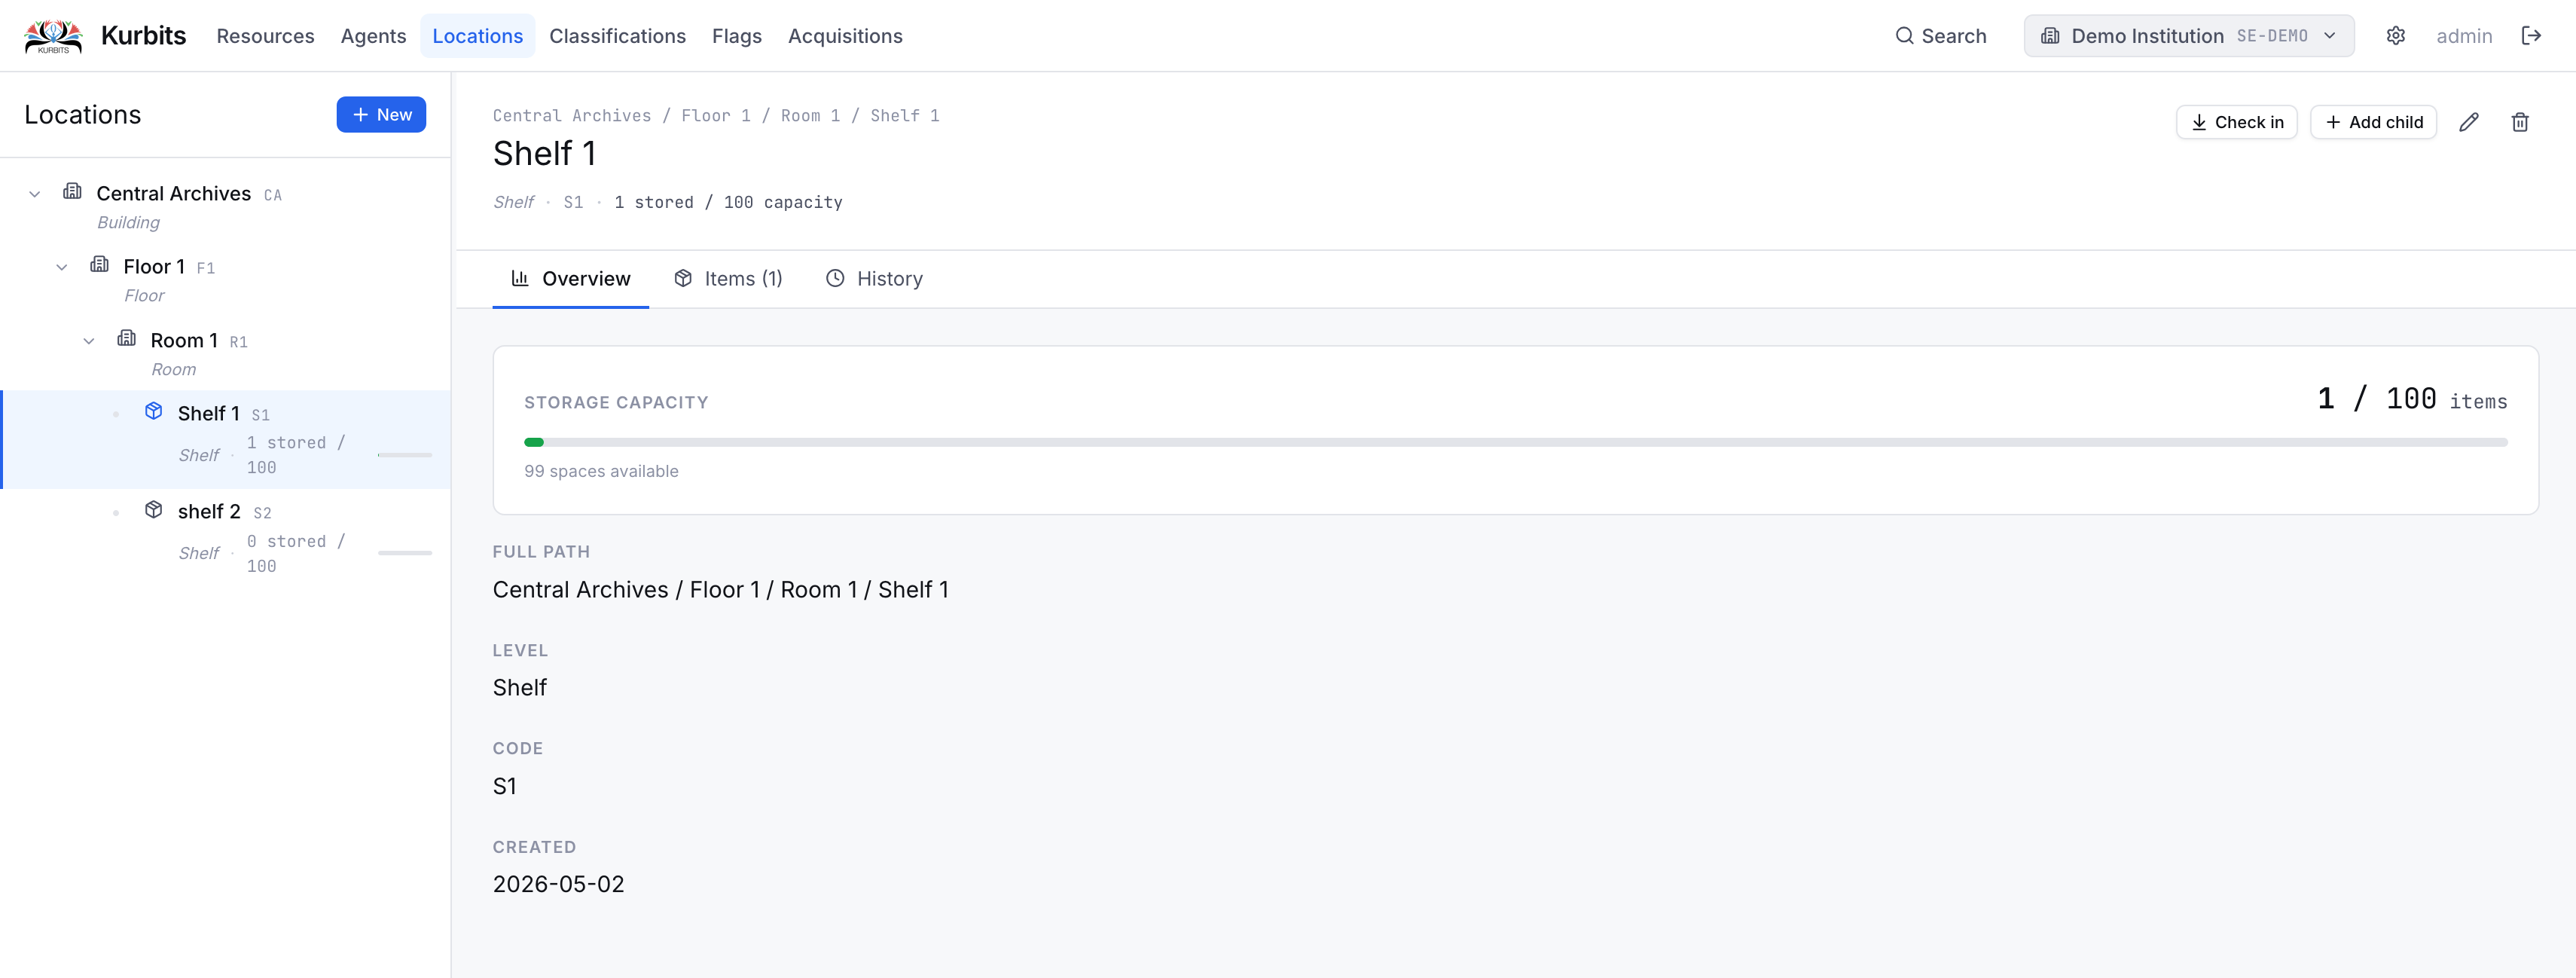
The Overview tab
Shows a summary of this location — its type, capacity (if set), number of objects currently stored, and basic details.
The Items tab
Lists all resources currently stored at this location.
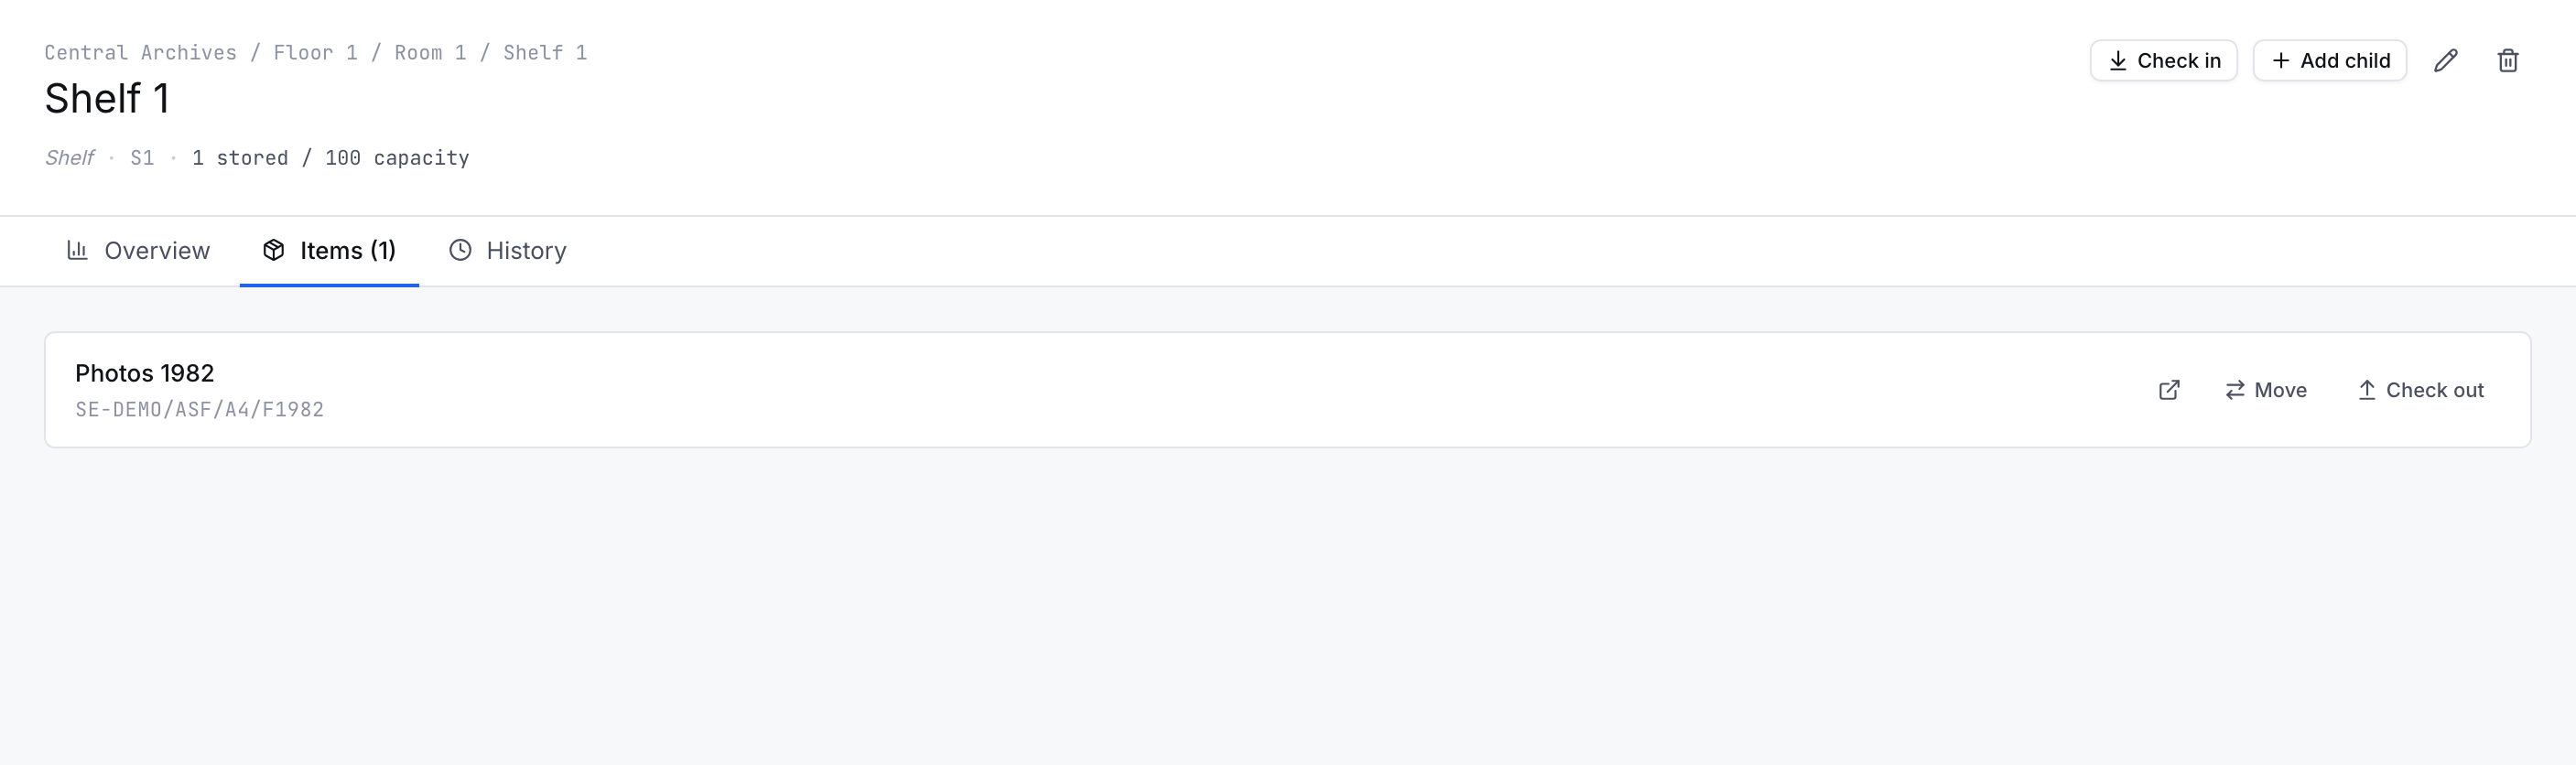
Each row shows the resource's reference code and title. From here you can:
- ↗ — Open the resource directly
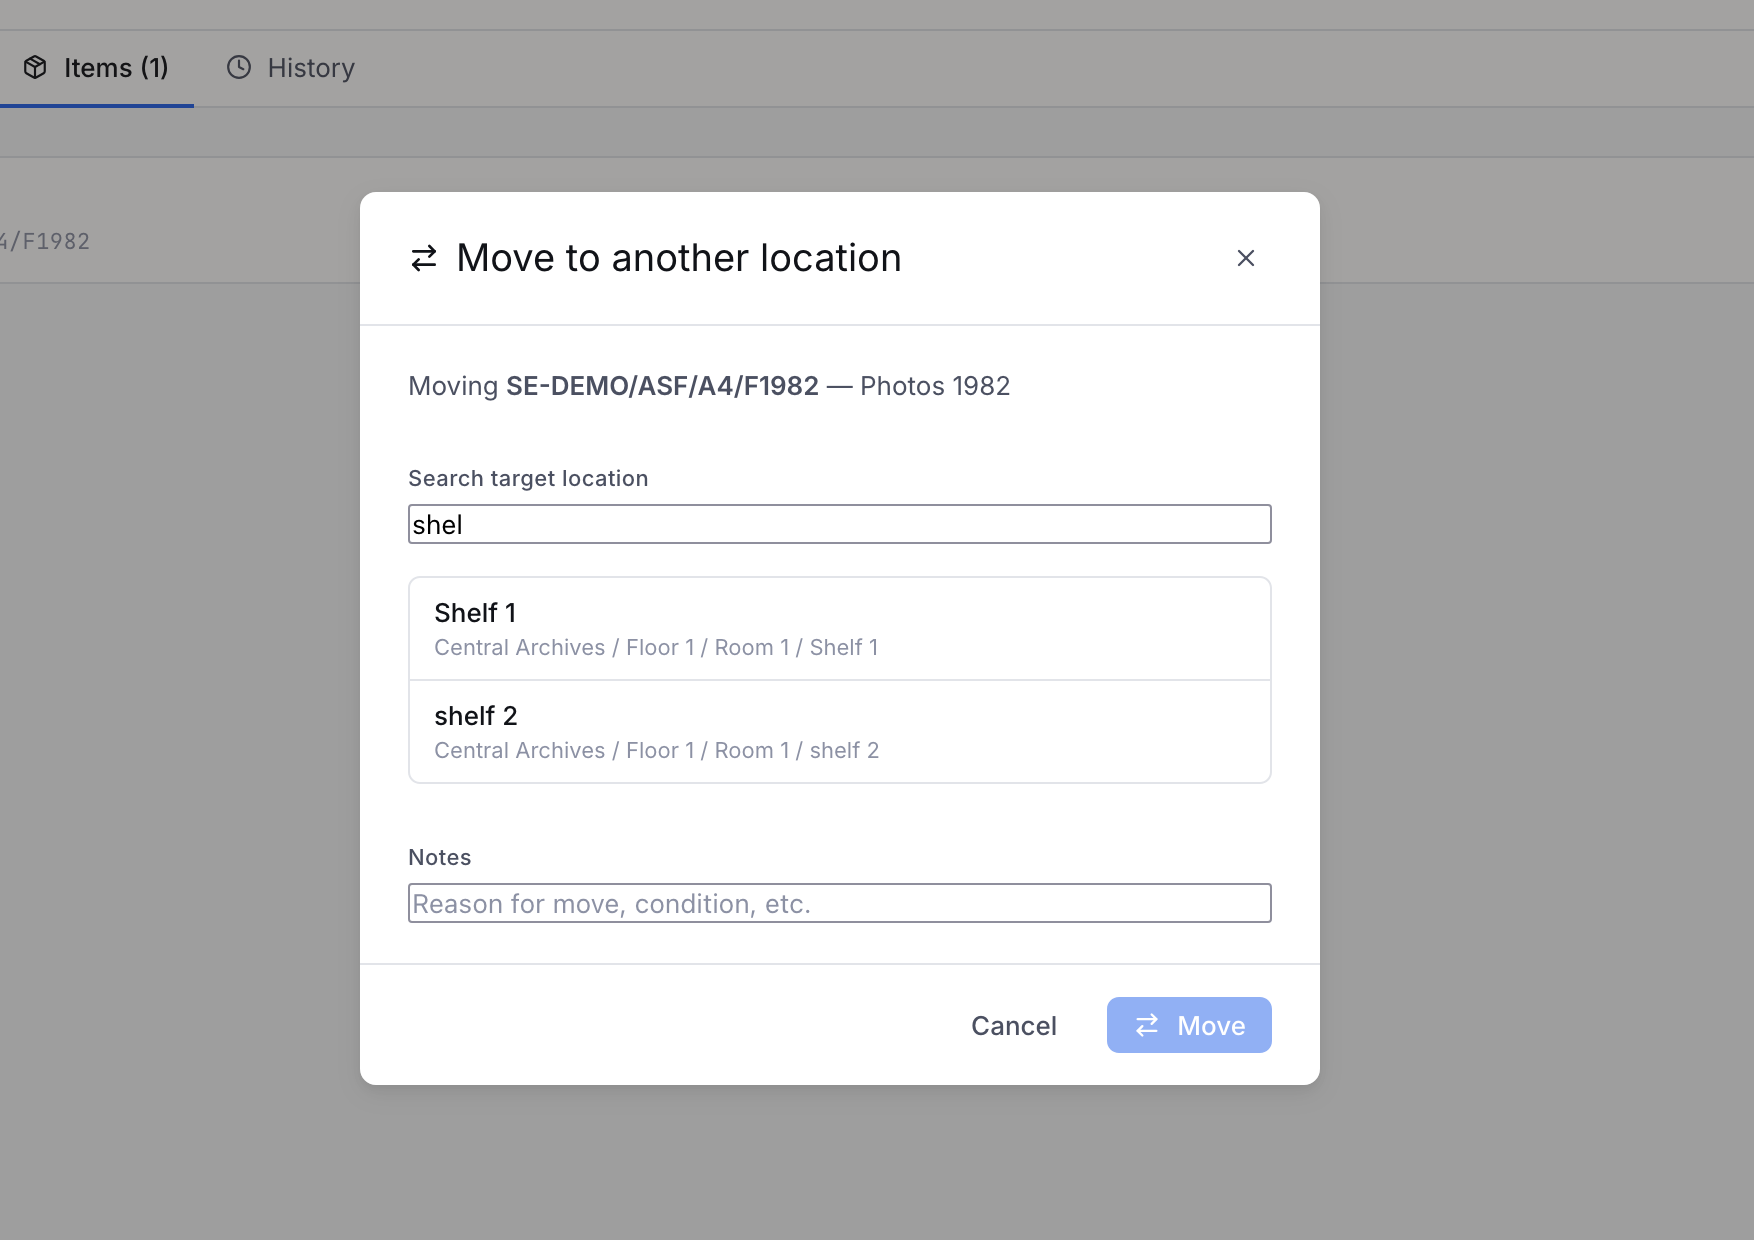
- Move — Move the object to a different location (opens a location search)
- Check out — Remove the object from this location and place it in the virtual Checked out location
The Checked out location is a system-managed virtual location. Objects checked out appear there until they are checked back in to a real location. You cannot check out an object that is already checked out.
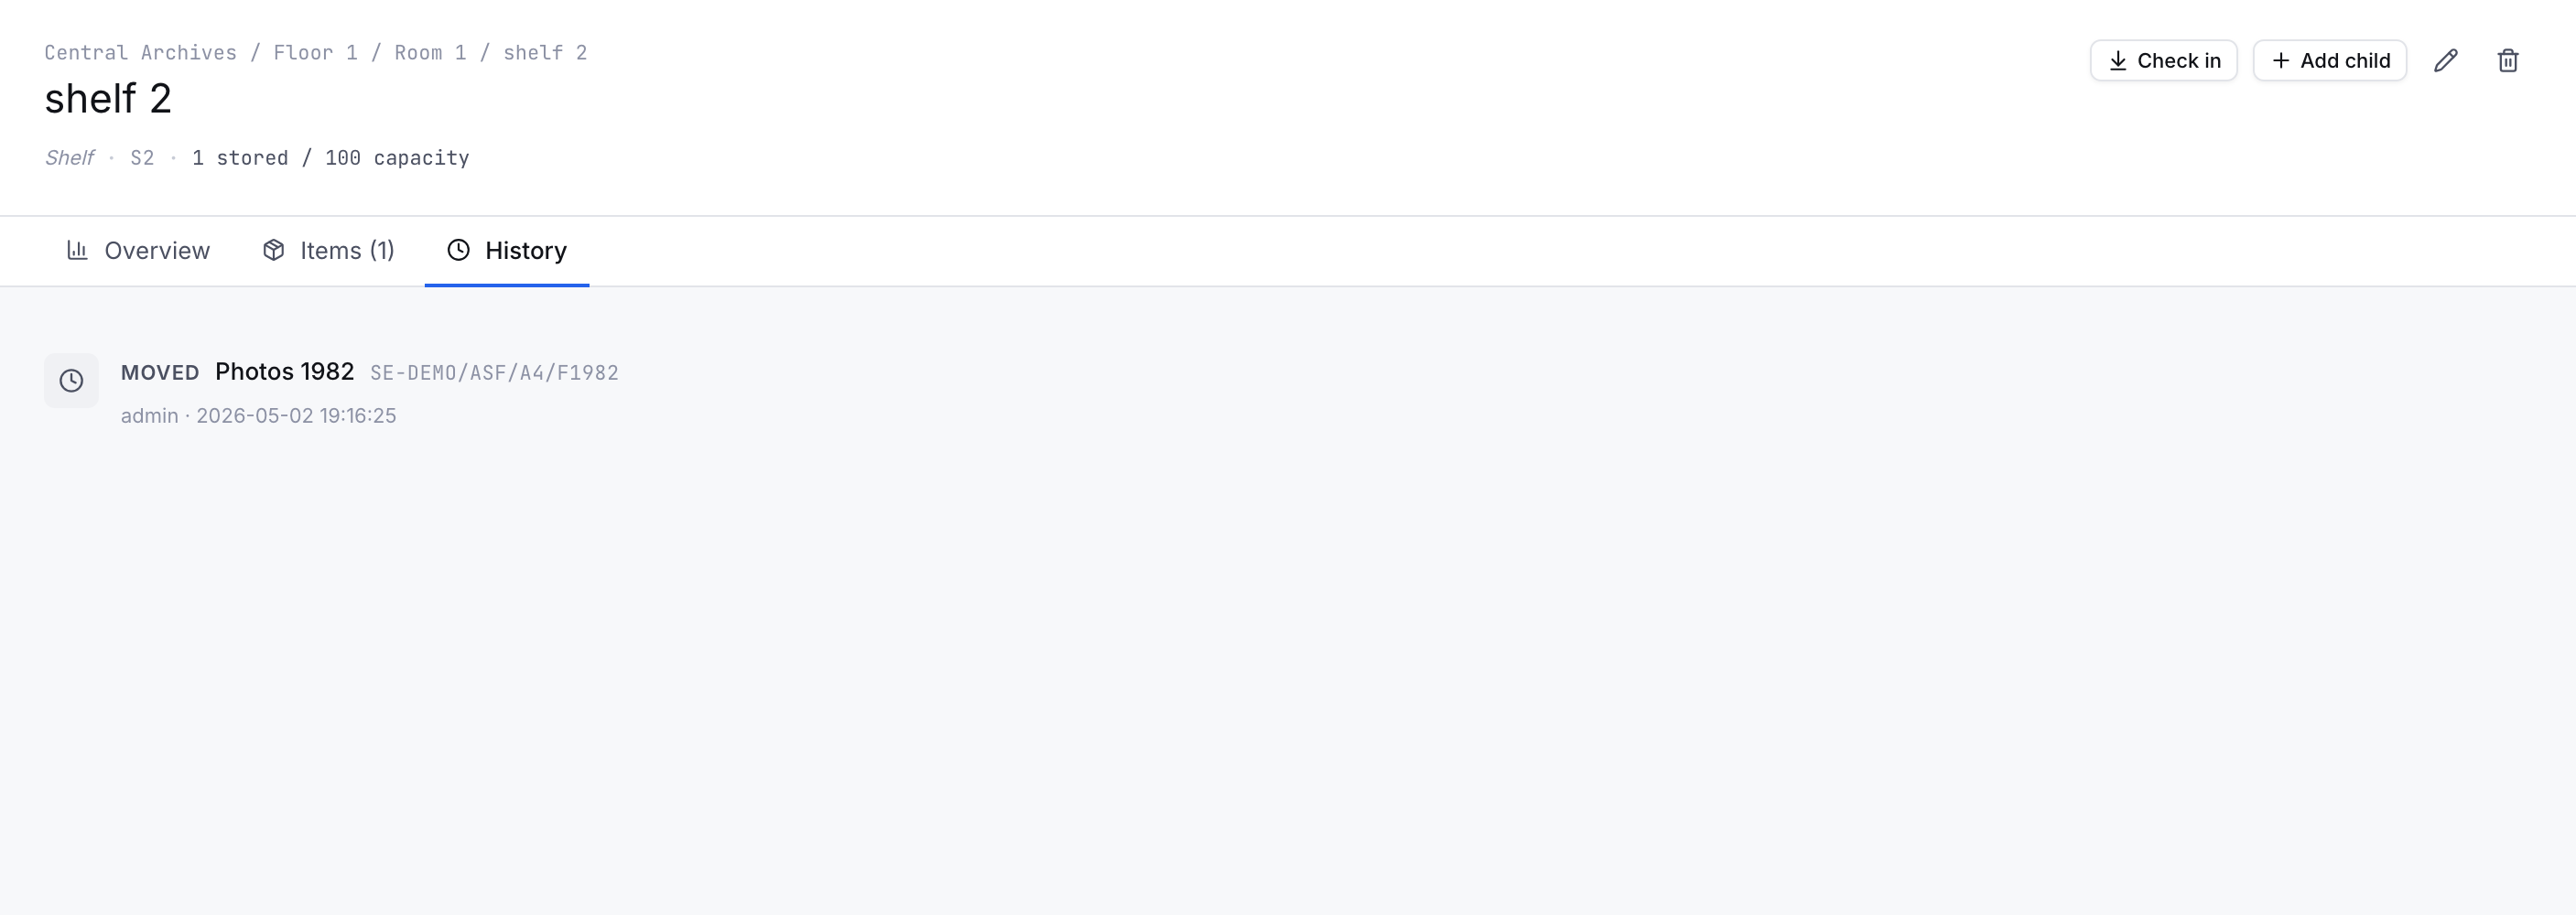
The History tab
A movement log for this location — every object that has come in or out, with dates and users.
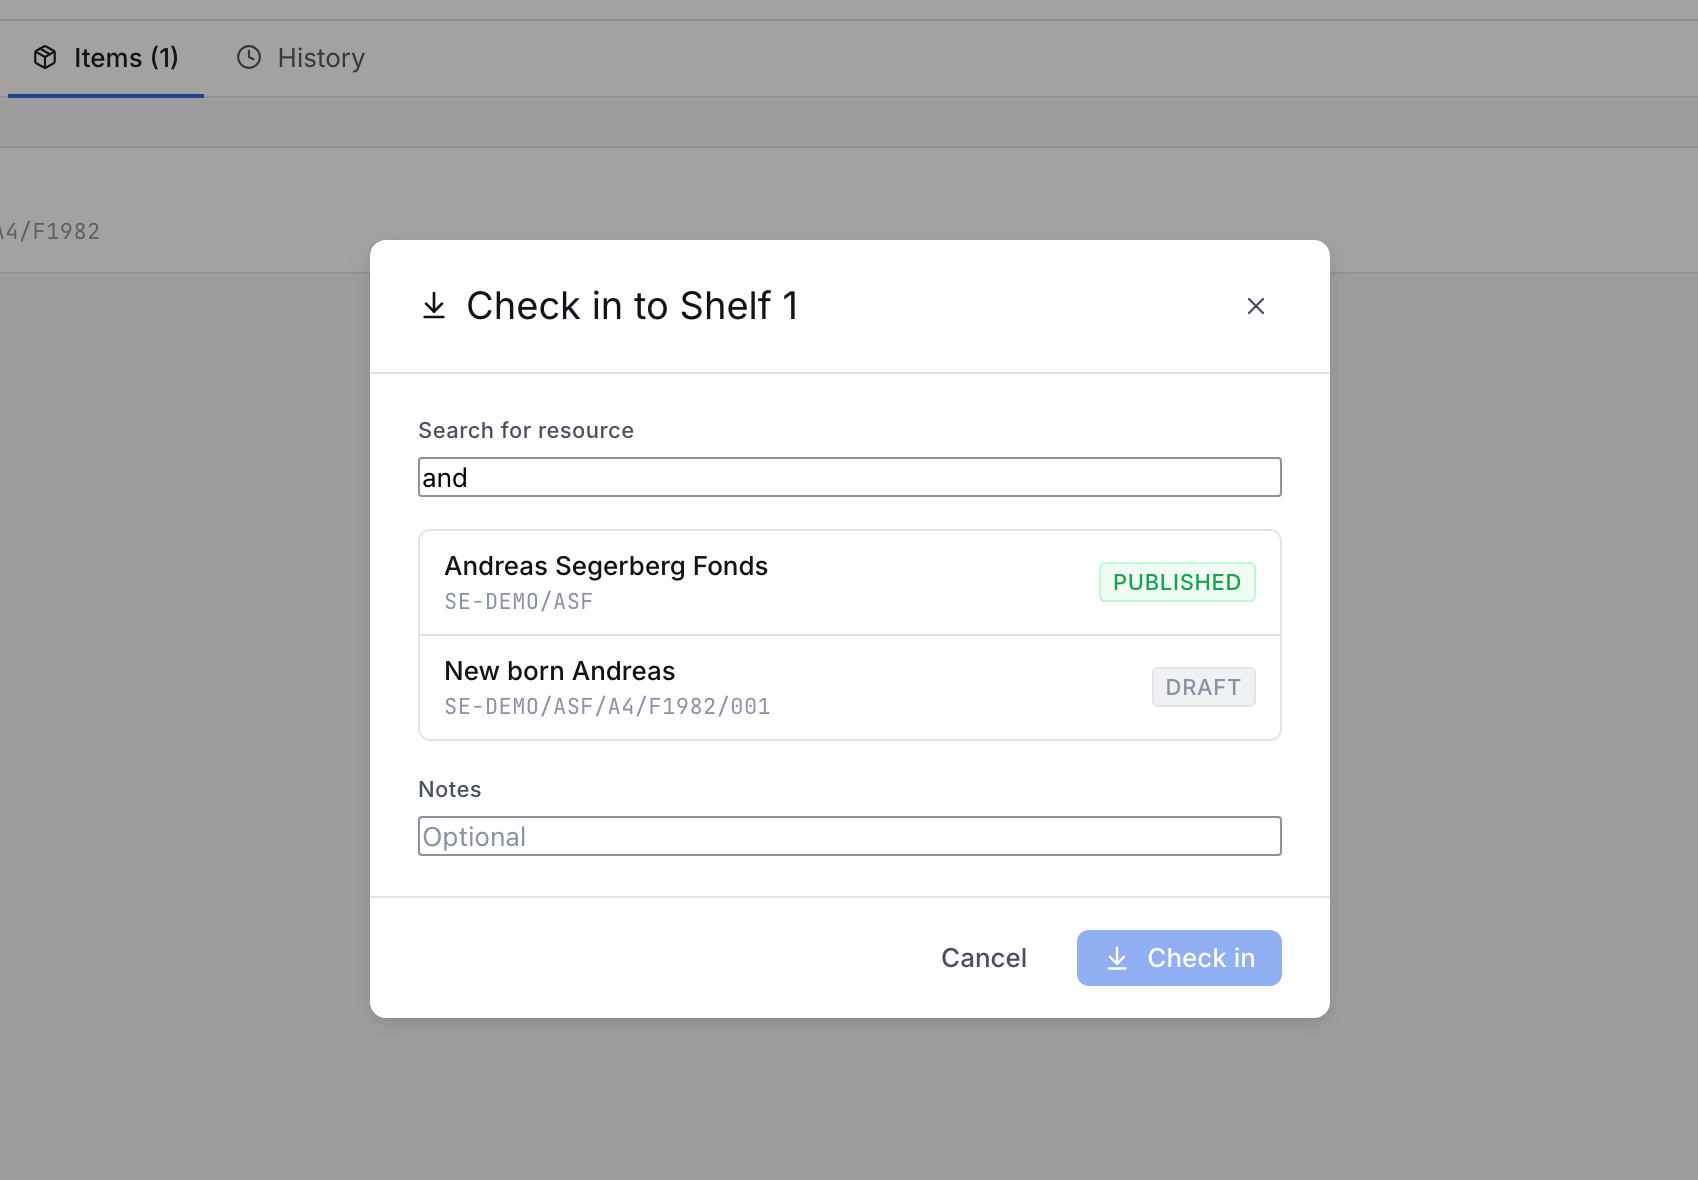
Checking in an object
To check an object into a location, first navigate to that location and click Check in. Search for the resource by title or reference code and confirm. The object is automatically removed from its previous location — an object can only be in one place at a time.
 Alternatively, use the Locations tab on the resource itself — see Resources → Locations tab.
Moving an object
From the Items tab, click Move on any stored object. A search panel opens — type to find the target location and confirm. Movement is recorded in the history with the from- and to-location.